
Voicing Hand
As discussed above, an intimate working knowledge of guitar is often beyond the habitus for many music therapists who learned music in classical piano studios. Participants reported minimal to no formal guitar training in their music therapy training. To survive practicum, they often learn a few chords as shapes though did not necessarily learn where the notes and intervals were in that shape. Even on the piano, many were reliant on the arrangement to do this for them and they were not always aware of these features in their piano recitals either.
Typical chord shape diagrams were used to illustrate how the fourth-semitone relationship of the strings and frets can be manipulated to form and alter chords on the guitar. For those with a predominantly recital-based background, they may not have an applied sense of the harmonic devices used to create various musical effects. This approach was touched on incidentally throughout MM to reinforce a variety of potential applications.
The diagram is an annotated chord shape diagram with some additional features to highlight the topographical features of the guitar. The diagram has the same orientation as the fretboard annotated with the piano white notes in The guitar pictured is a right-handed guitar as chord shape diagrams are commonly drawn in the right-handed orientation. Chord shape diagrams such as this are often found in popular music lead sheets, piano scores, and more recently in various chord chart websites and apps.
The chord illustrated is a D major in first inversion, commonly depicted in popular music as D/F#. In slash chords, the first letter is the chord and the letter after slash is the bass note. Slash chords are used to indicate an inversion or a passing note in the bass, they are not required if the chord is intended to be played in root position as the bass note is assumed. This approach facilitates a level of access to inversions, however, without a working knowledge of harmony and scale theory, one is reliant on the chord sheet to suggest this approach in a similar way to recitalists relying on the scored arrangement.
The heavy black line at the top of the grid represents the nut at the end of the fretboard. The nut is not included if the chord is voiced up the fretboard. Diagrams without a nut will include a fret number label to indicate where the voicing is situated on the fretboard. The grid represents the fretboard. For differentiation purposes in this diagram, the strings running parallel to the fretboard are purple and the frets running perpendicular to the fretboard are green. The fretboard will be monochrome in subsequent chord shape diagrams.
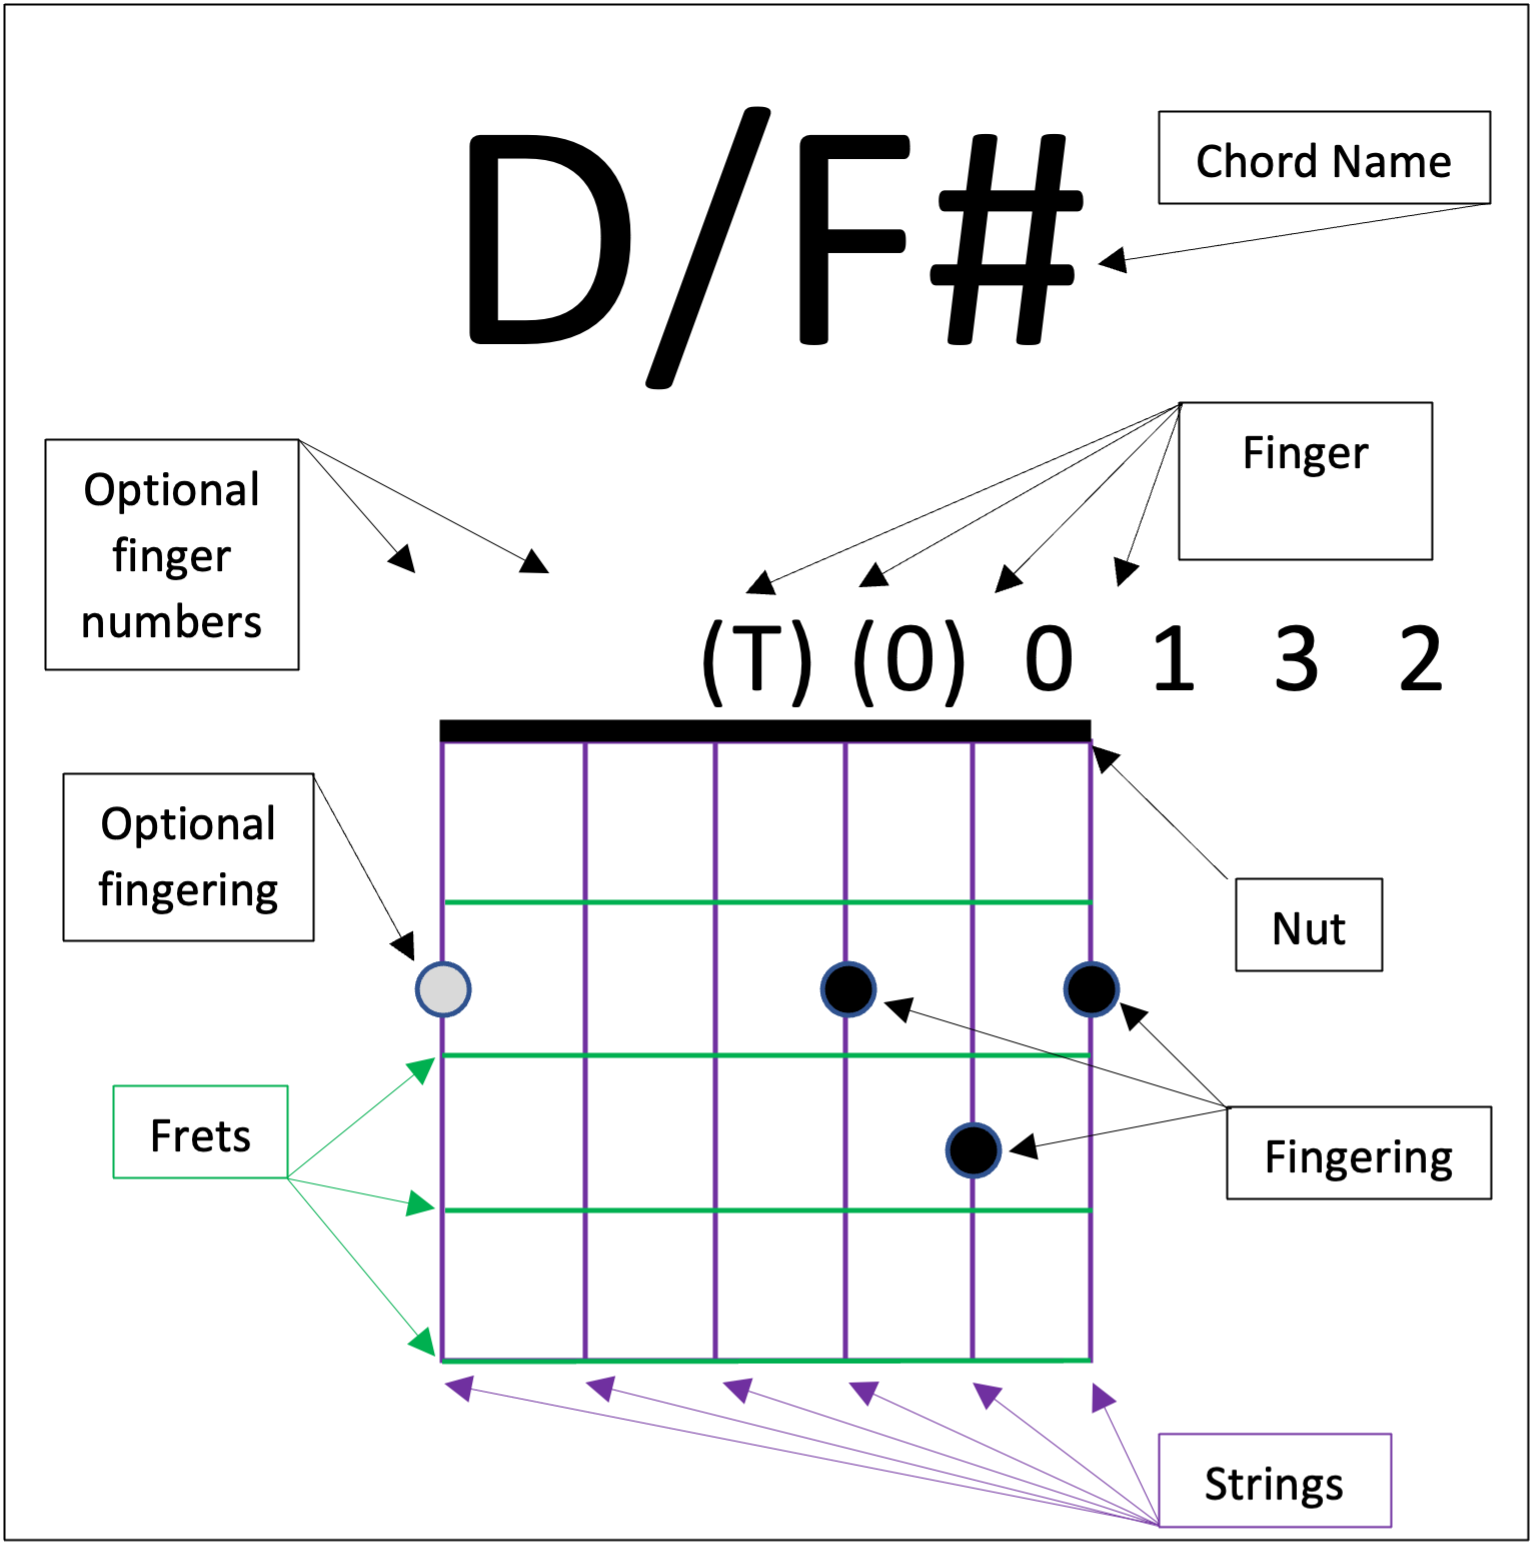
Fingering is indicated by black circles on the fretboard and optional or altered fingering are shown with grey circles. Finger numbers are indicated above the nut with the corresponding fingers above each string. Strings marked X should not be played, strings marked 0 should be played open, and strings marked with a T or a digit from 1 – 4 should be fretted with that finger.
In this chord for example, the second finger plays an F# on the 2nd fret of the 1st string (E treble), and the third finger plays a D on the 3rd fret of the 2nd string (B). Translating this from frets to semitones the first finger goes two semitones up the E string to form an F# and the third finger goes three semitones up the B string to form a D.